


Starting a New Blog From A to Z (Part 2 Case Study)
So in Part 1 of Starting a New Blog, I shared how I came up with a topic, how I chose and researched the name and domain address. I installed WordPress, chose a theme, added plugins, imported the demo content and widgets… the Nu Mom blog is ready to roll!
Starting a Blog, Part 2….
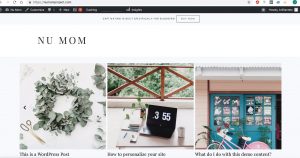
A few tweaks I’ve just completed: First, I’m cleaning up the widgets, removing the meta widget (login etc) for security purposes (hacker magnet.) I’m also removing the archive widget, since technically I have no archives at this time. This is where we are at the moment:

Step 7. Create an Account in Google Analytics and Search Console. As I set up Monster Insights plugin, I go ahead and create a Google Analytics account. This is pretty simple, but the Google Search Console setup can be a bit more of a pain (I’m hopeful Google will make this easier in the future.) There is no rush for this one however- just make sure you have it up as you start getting traffic, so you can monitor statistics for the future.
- Google Analytics
- Google Search Console (formerly webmaster tools). (Hosting provider-specific instructions)
New Blog Social Media
Step 8. Setting up social media profiles. For this blog, the majority of my marketing will be on social media, vs. relying on search engine traffic for the majority of my other blogs. As I mentioned in “Starting a Blog Part 1,” I use a fab site called KnowEm.com, that allows me to check name availability across the major social media sites with one click. I already have a good idea of which names are free.
Unfortunately, “NuMom” is taken just about everywhere, so I will go with @NuMomProject but use the name “Nu Mom” across all profiles. Consistency is key here, for branding.
I’m going to create a basic profile description as well, and a quick “logo” and social background image on Canva. If you aren’t familiar with Canva, you will want to be. This is a great alternative to the more complex Photoshop, and offers countless templates for everything from social media graphics, to marketing printables. There is even a Canva mobile app. I <3 Canva for making my life easier.
For now, I’m setting up a few that I feel will fit Nu Mom well.
- YouTube
- Tumblr
Now, normally, I would go onto Fiverr at this point, and find someone to create images and begin to post to these social media accounts. I’ve found that Fiverr has gotten a little more complicated when it comes to finding quality help these days, so I’m going to opt to do this myself, when I’m feeling bored.
I’m using the app Typography, and Canva, to create graphics, but…. I’m going to see which sizes work with my blog theme because….. I will use these apps to create the graphics for my blog posts, then share the blog posts with those images, on social media. This is a huge time-saver, vs. creating a graphic for a blog post and another for social media, and even worse- multiple for different social media accounts. We want to find that ONE size image that works across the board. (Hint, usually this is the instagram sized graphic.)
I can usually create a graphic in about 1 to 2 minutes, on my phone. I’ll create a handful at a time and upload them to my blog with a blogging app (I’m currently using the WordPress app but you can log directly into your site from a mobile browser if you prefer.) Once these are all added, I’ll use them as “featured images” as I write my blog posts.
More on social media later….
Step 9. Email Subscription Setup. This is one I set up early on, because the minute I share to social media, I will start getting a few random blog visits. I want them to have the opportunity to join the mailing list so I can bring them back in the future. We need an email opt-in form on the site, stat.
I’m going to use Aweber this time, because they are inexpensive and easy to set up. Once my traffic grows, I will consider switching to ConvertKit (<3). You can compare the 3 most popular services here:
- Aweber – Super cheap and easy to use. Starting out, it’s less than $30. Price goes up as your list grows.
- ConvertKit – I love ConvertKit. Hands down, my preferred subscription service, but there is no need to spend $100+ a month when you are starting out, unless you prefer not to have to change it later (which can be a pain.)
- MailChimp – A bit complicated to use at this time, so I don’t typically recommend it for those starting out.
Writing that first blog post…
Update: We’re going on late Day 2 of Nu Mom now. I am about 12 hours behind where I would normally be with a new blog start-up, simply because I’m taking my time to create this journal along the way.
Step 10. I wrote a blog post. I still have some set up to do, but I thought I’d take a break and write an actual blog post… because that’s the fun part, right? You can see it here: New Mom Nursery Checklist.
How do I know what to write? I do keyword research, and I will google my main phrases (New Mom) and see what questions and queries Google shows. Keyword research showed me that new mom’s want to know what they need for their baby’s nursery. The Google search showed a number of questions that I can put into an FAQ page. I will keep adding to the FAQ page doing the same thing with other queries. Over time, I will expand on those questions to full articles, and link to them from the FAQ questions. This is a great way to keep track of what your readers need, and to offer them complete and detailed answers.

Step 11. Add more content. I fill out my contact page, about page, and double check that I have a completed privacy policy linked at the bottom of the site. I also create a quick FAQ page, and a few short blog posts. You will need to do this before applying for an AdSense account and affiliate programs afterward.
Placing ads on your new blog…
Step 12. Apply to Google AdSense. I will write an expanded blog post on working with this, but now it’s time to apply to Google AdSense. Sign up takes only a few seconds, and they have plenty of support for adding their code to your header. It does take about 3 days for them to review your site and make sure you have 1. Existing content and 2. That you are abiding by their TOS.
Take note- ethics are key here. ALWAYS ABIDE BY AdSense TOS. I have earned millions of dollars with AdSense, and have always stuck to the rules- so it’s easier, and I can sleep at night. I have however, seen countless others cheat the system with cloaking, unapproved topics (hate topics, drugs, betting, pornography…) and it never ended well. To be honest, I never understand why people go blackhat and blackpath here, when it is so easy to make ridiculous money playing within the rules and focusing on helping others. It’s a no brainer.
If you already have an AdSense account, simply add the new site with these instructions.
Step 13. Placing Ads. There are two plugins I recommend for doing this (recommended by Google as well.) Advanced Ads and Ad Inserter. I like both and for now, I feel it is just personal preference for choosing one. For Nu Mom, I’ll use Ad Inserter (I’ve just used this forever- both are great though, and Advanced Ads has step-by-step guides and tutorials from the get-go.)

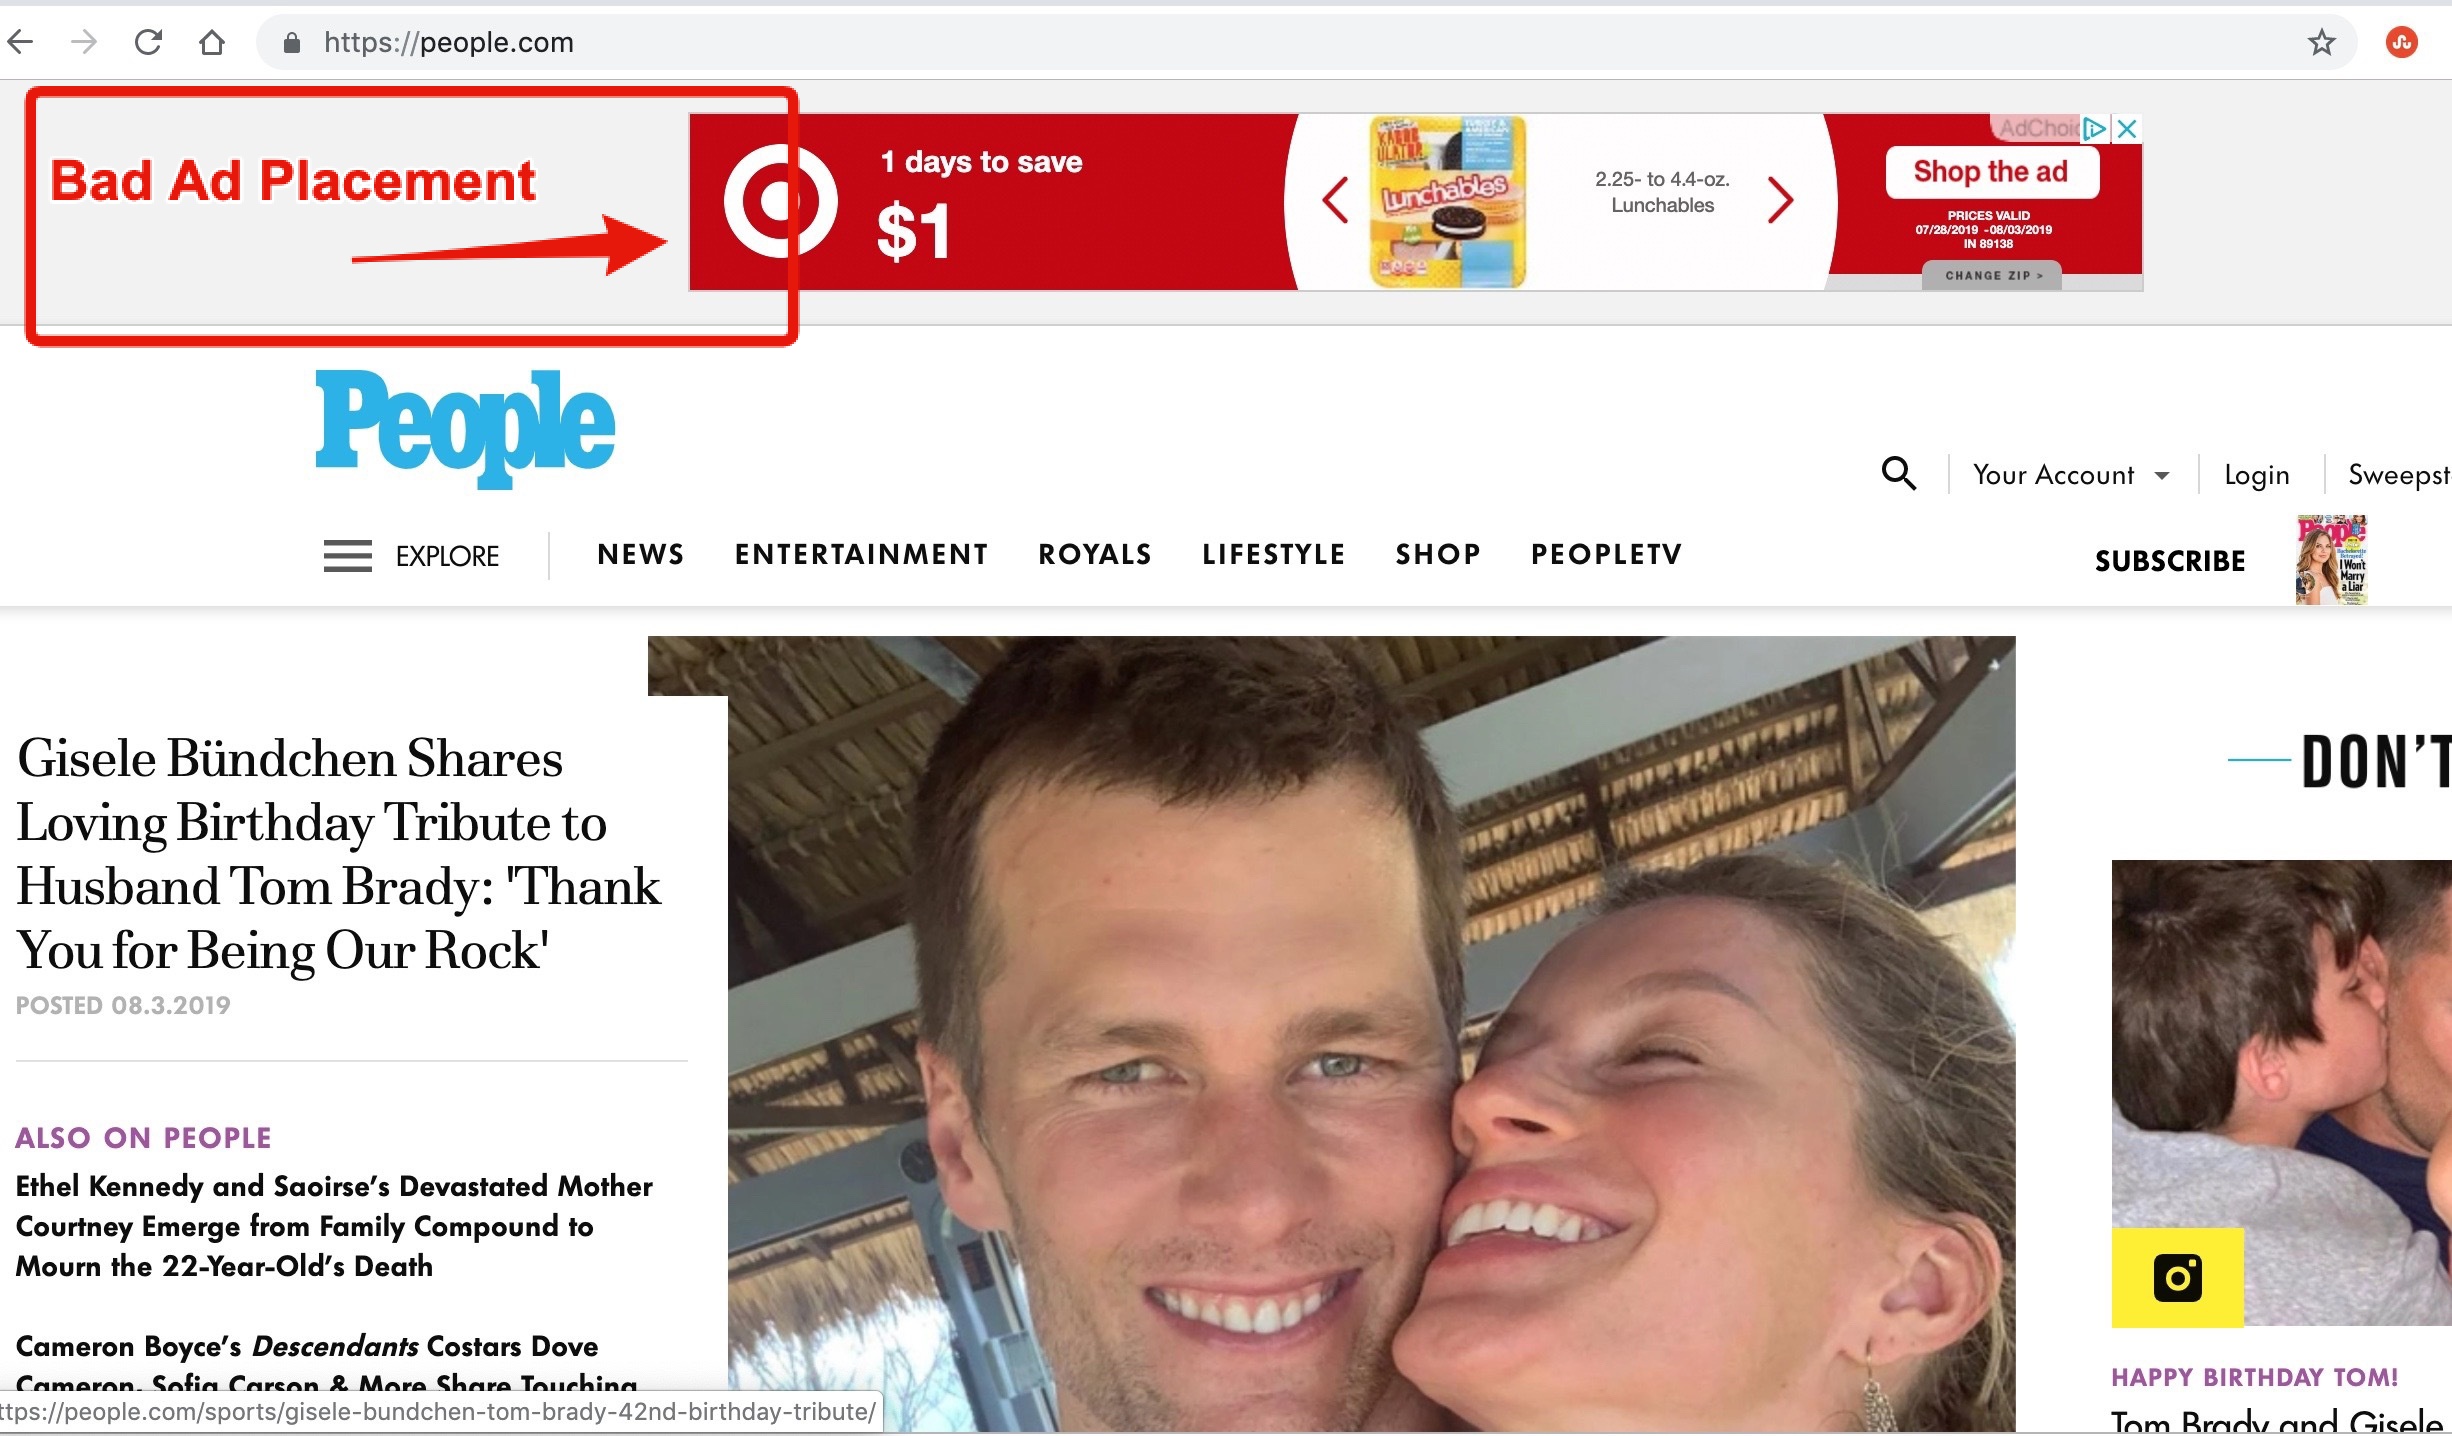
Ad placement is key. Google AdSense has a heat map that works as a general guideline, but to be honest, so much depends on your theme’s layout, design, and even your content. Google’s heatmap is a great place to start, but you will want to test…. for the rest of your blog’s life. In the meantime, I have a few rules to stick by.
- You want to use as few ads as possible. Too many ads slow your site and tick-off your readers. It also has a negative effect on your credibility, because the blog can appear to have the larger purpose of making money vs serving your readers. If your credibility is gone, so are your readers.
Be strategic with your “very few” blog ads.
- Place ads IN THE CONTENT. I say this again, ADS GO IN THE CONTENT. Think, text wrapped, close to navigation, etc. IN THE CONTENT. I have to say this multiple times, because I will still have a few bloggers send me their blogs with ads exactly where they shouldn’t be (cough, top page banner… cough cough) wondering why their ads are not performing.


- Place ads where their eyes will be spending time. So… you probably don’t want to place it next to a “call to action” button that takes them away from the page, kapeche?
- Place ads close to images, especially below larger images in blog posts. People linger on photos, and they almost always read the content just below them. They won’t miss that ad just below and it just might interest them.
- Bottom of a blog post is a great spot, since readers are looking for a “next” option…. and it might just be an ad click if it interests them.


I will add examples of “yes” ad placement as I find them.
Cut to… Found one! I created a gif out of this site, so you can see as I scroll. Notice the in-post ads are quite a bit down and surrounded by content. This is well done, although I do find that large and medium rectangles do better, wrapped in text. Also, I’m a huge fan of the rectangle ad that stays in place as you scroll to the bottom of her sidebar. I’ll show you how to do this in the separate post on ad placement. Note: she does use a pop-up banner at the bottom- I’m not an advocate of these for reasons mentioned above. I would also have some kind of text or email opt-in above the large Marriott ad to the right. The reason is because the post’s beautiful featured image steals the show here so you’re not going to get too much attention on that ad. I would also be interested to know if her short banner ads did better, moved up, just below the images in the post.
Step 13. Writing blog posts and …. status update.
So we are looking like this now:

Keyword Research for creating on-topic blog posts
I have about 5 blog posts up, all based on a little keyword research using SEMRush. I used their “magic keyword tool” and searched for “new mom” to find the most popular search queries. There were plenty of “New Mom gift” keyword phrases- this is great, because the commercial intent is high on this one (meaning, searchers are potential shoppers.) “Advice for New Moms” and “New Mom nursery tips” at the top of the list- these were all great blog post topics. I will continue to go down the query list.
Now the reason I want to do this, isn’t because I’m trying to please the search engines, but because this is the genuine interest of my potential readers. This is what they are searching for… this is what is on their minds.. therefore, I want to provide them with that information.
Blog Post Images:
I purchase my images from Canva in most cases. They cost $1. Personally, I like the crisp professional images they have, and the ease of finding them, and the fact that I can easily find and use them again within my account. I will also sometimes use a few of the sites below.
Note: You NEVER want to simply grab images from the internet- it’s unethical and risky (you could get a bill down the road for $8k in royalty damages from an angry photographer- I’ve seen it happen.)
Here are a few places where you can find images for you blog:
- Canva.com
- Freeimages.com
- Pixabay (love this one – they have an app as well)
- Unsplash
- Photo Pin – searches flickr for creative commons (free use) images
- Public Domain Pictures
- New Old Stock – vintage photos that are now free to use by the public
- Pickup Pics – free high resolution images
- Splitshire – beautiful, free photos for commercial use
- Public Domain Archive
- LibreShot
- SkitterPhoto
- StockSnap.io
- Wikimedia
- Shutterstock
Social Media…
In addition to writing a few new blog posts, I have also been steadily adding to the Nu Mom instragram account, and twitter. I’m not going to worry about YouTube or FB just yet.
This is day 4 since the blog went live, and I am proud to say that I have had 44 people visit the site. A few were friends, including one that is about to be a new mom herself and needed some advice. The rest came from social media. This is a great start!
For the next two weeks, I’ll be limited on how much time I can work on Nu Mom and Brilliant Etc. Hubby’s band is playing in LA so we’ll be traveling a bit, showing my support and then sneaking away to LegoLand with our son 🙂
Follow along as I update…


1 Comment